

Starting an online business can seem challenging, but with Shopify, the process becomes seamless and straightforward. As one of the world’s leading e-commerce platforms, Shopify empowers anyone to build a professional online store, showcase products, and reach customers across the globe.
Setting up your store the right way from the very beginning is essential for long term success. In this guide, we’ll walk you through each step to help you create a powerful Shopify store with ease and confidence.
Table of Content
- Step 1: Create Your Shopify Account
- Step 2: Choose the Right Shopify Plan
- Step 3: Pick and Customize a Theme
- Step 4: Add Your Products
- Step 5: Set Up Payment Gateway
- Step 6: Set Up Shipping Settings
- Step 7: Add Essential Pages
- Step 8: Install Useful Apps
- Step 9: Test Your Store
- Step 10: Launch Your Store
- Tips and Tricks
- Final Thoughts
- FAQs
Step 1: Create Your Shopify Account
The first step is to sign up on Shopify. Go to the Shopify website and click on “Start Free Trial.” You will be asked to enter your email address, password, and store name. After sign-up, open the Shopify admin (your dashboard) and fill in basic settings: store address, contact email, currency, and business details.
These settings affect taxes, payments, and shipping later, so enter them carefully. Follow Shopify’s step-by-step setup guide in the admin to finish the basics.

Step 2: Choose the Right Shopify Plan
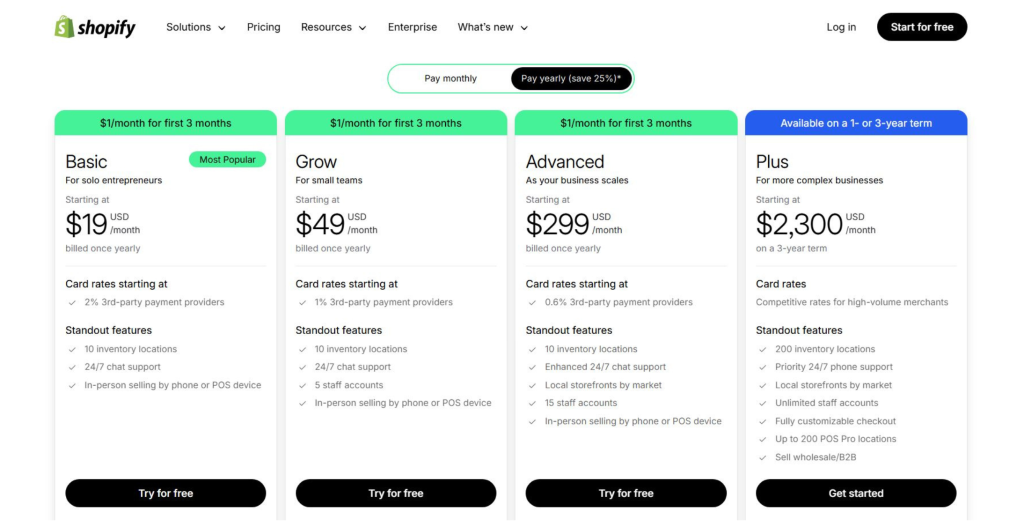
Shopify offers different plans such as Basic, Shopify, and Advanced.
- Basic Plan: Perfect for beginners.
- Mid-tier Plan: More shipping discounts for growing stores.
- Advanced Plan: Best for large businesses with teams and analytics needs.
In the beginning, you can start with the Basic plan. It is budget-friendly and gives you all the tools you need to launch your store. Later, when your business grows, you can upgrade to a higher plan.
Step 3: Pick and Customize a Theme
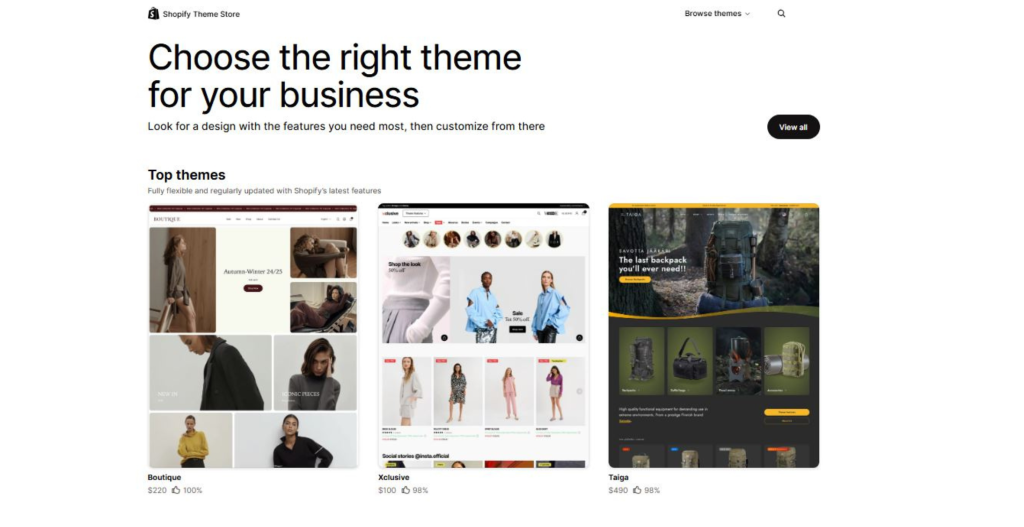
Your store’s design is the first thing customers notice and it strongly shapes their shopping experience. Shopify makes this easy through its Theme Store, where you can explore both free and paid themes.
Choose a theme that reflects your brand and complements your products. Once selected, you can easily customize it by adjusting colors, fonts, and layouts using Shopify’s intuitive drag-and-drop editor, no coding required.
Popular theme options include:
- Best beginner theme: Dawn (modern and flexible).
- Other free themes: Crave, Craft, Sense, Taste, Studio.
- Premium themes: Drop, Bullet, Be Yours.
You can switch themes anytime, so don’t overthink your first choice, focus on selecting a clean, user friendly design that aligns with your brand.
To enhance your store’s shopping experience, consider adding WizeSaaS Quick Buy Button. This tool integrates seamlessly with any Shopify theme and allows customers to purchase products faster, reducing friction at checkout and increasing conversions.

Step 4: Add Your Products
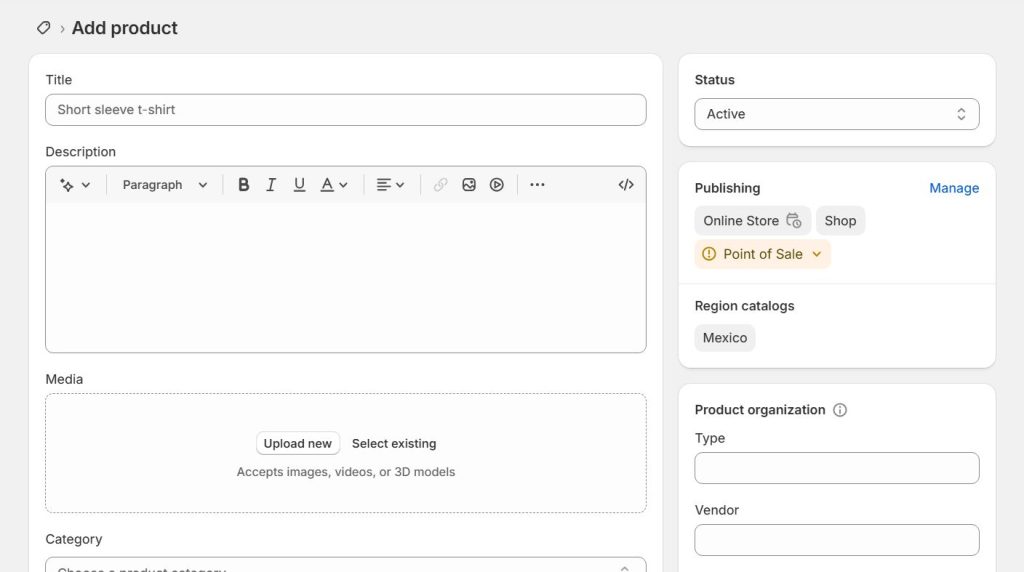
Once your store design is ready, it’s time to add the products you want to sell. In your Shopify dashboard, navigate to the “Products” section and click “Add Product.”
Start by writing a clear product title and a compelling description that highlights the key features and benefits. Upload high quality images from different angles to build trust and attract buyers. Don’t forget to set the price, update stock information, and assign relevant product details such as SKU or variants.
To make navigation easier for your customers, organize your items into collections (groups of related products). This creates a more structured shopping experience and helps increase sales.
Step 5: Set Up Payment Gateway
- Enable multiple payment options to offer customers more flexibility.
- Set up manual methods (such as Cash on Delivery or Bank Transfer) if your market requires them.
- Review transaction fees and currency settings before activating.
- Test the checkout process to ensure everything works smoothly prior to launch.

Step 6: Set Up Shipping Settings
- Add shipping profiles if different products require unique shipping costs or locations.
- Connect a shipping carrier (like USPS, UPS, or DHL) to access real time rates and print shipping labels.
- Set clear delivery times so customers know when to expect their orders.
- Offer free shipping above a certain amount to encourage larger orders.
- Test your checkout and shipping settings before launch to ensure a smooth experience.

Step 7: Add Essential Pages
A professional store needs more than just products. You should add important pages like:
- About Us – Tell your brand story.
- Contact Us – Make it easy for customers to reach you.
- Privacy Policy & Return Policy – Build trust and protect your business.
Shopify has built-in templates for policies, which saves you time.
Step 8: Install Useful Apps
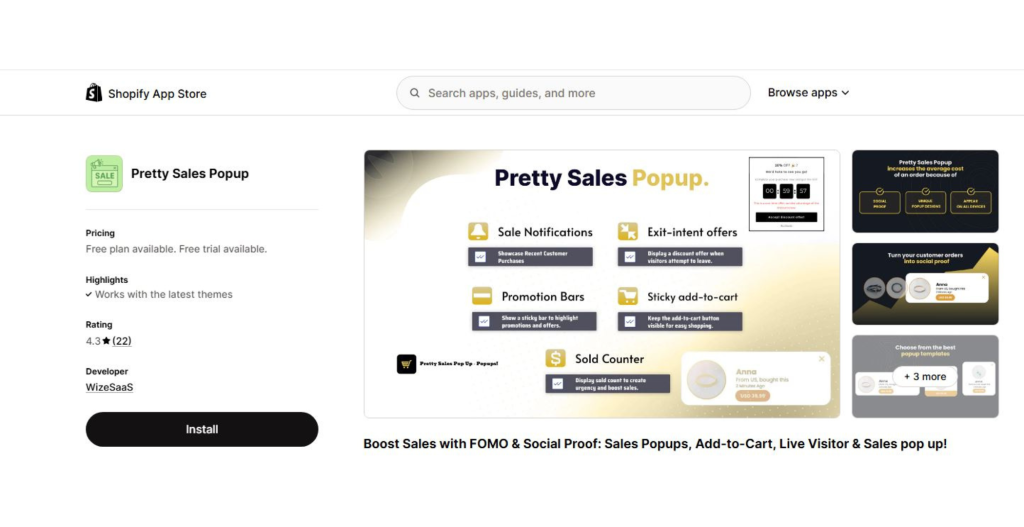
One of the biggest advantages of Shopify is its App Store, which offers thousands of apps designed to help you grow your business. These apps can enhance every aspect of your store from marketing and sales to customer support and operations.
For example, you can install apps for email marketing, product reviews, upselling, or inventory management. To keep your store fast and organized, it’s best to start with only the essential apps and add more as your business grows.
Some great tools to consider are:
- Pretty Sales Popup – builds social proof and boosts conversions.
- EZ Quick Buy & Quick View by WizeSaaS – speeds up checkout and improves the shopping experience.
Smart app selection can streamline your operations, increase customer trust, and help your store scale efficiently.
Step 9: Test Your Store (Before Going Live)
Before launching your Shopify store, test everything as if you were a real customer. Check if all pages load properly, payments process correctly, and shipping rates are accurate.
Here’s what to test:
- Add products to the cart and complete a test checkout (Shopify has a test mode).
- Try using a discount code to see if it works.
- Review taxes, shipping options, and total costs at checkout.
- Test email notifications – order confirmation, shipping update, and refund (if applicable).
- Check your product pages: titles, images, descriptions, and prices.
- Test how your store looks on mobile, tablet, and desktop.
- Check your website speed and fix any slow-loading pages.
- Review your contact forms and chat widgets to ensure they work.
- Verify that your store policies (refund, shipping, privacy) are linked and easy to find.
- Use Shopify’s launch checklist to confirm you’ve covered payments, delivery, SEO, and analytics setup.
- Create collection to organize products on your homepage like collections for New Arrival, Summer Collection, winter Collection, Top Selling, New Trending.
When everything works smoothly, remove password protection and officially publish your store!
Step 10: Launch Your Store
Now your store is ready to go live!
1. Remove Password:
Go to Online Store → Preferences and turn off the password page. This will make your store visible to everyone.
2. Check Everything Once Again:
- Test your checkout and payment methods.
- Make sure product details, prices, and shipping are correct.
- Open your store on mobile and desktop to see if it looks good.
3. Add Analytics Tools:
Connect Google Analytics or Facebook Pixel to see who visits your store and what they do.
4. Announce Your Store Launch:
Share your new store on social media, email, or with your friends and followers.
You can also offer a small discount or giveaway to get your first customers.
5. Start Marketing:
Promote your store through Instagram, Facebook Ads, TikTok, and Google Search to get traffic and sales.
Congratulations!
Your Shopify store is now live and ready for customers!

Tips and Tricks
- Keep your page titles and product descriptions simple and honest.
- Use clear photos, and write short policies (refund, shipping).
- Start small: Add your best 10–20 products first and grow.
- Track your first sales and ask happy customers for reviews.
- Use built-in Shopify reports or connect an analytics app to learn which products sell best.
If you ever get stuck, Shopify Help Center and community forums are very helpful.
Final Thoughts
Setting up a Shopify store the right way helps you start strong and avoid mistakes later. From creating an account to launching your store, each step is important. Keep your store simple, professional, and customer-friendly. With effort and the right setup, Shopify can become the foundation of a successful online business.
FAQs
Q1. Do I need to buy a domain before setting up my Shopify store?
No, you can start with a free Shopify domain (yourstore.myshopify.com). Later, you can buy a custom domain from Shopify or another provider to make your store look more professional.
Q2. How many products should I add when launching my Shopify store?
You can start with a few key products – just make sure each product has clear photos, detailed descriptions, and prices. You can add more products later as your store grows.
Q3. What are the best apps to install for a new Shopify store?
The Shopify App Store has thousands of apps for marketing, sales, and customer service. To begin, use simple and effective ones like EZ – Quick Buy & Quick View and Pretty Sales Popup by WizeSaaS – they help increase conversions, build trust, and make your store more engaging.
Q4. Can I change my Shopify theme after launching my store?
Yes, you can change or edit your Shopify theme anytime. Just make sure to preview the new theme before publishing it to keep your store design consistent.
Q5. How can I make my checkout process faster?
You can make checkout faster by adding a Quick Buy Button by WizeSaaS, which lets customers purchase directly without visiting multiple pages.
Q6. Do I need coding skills to use Shopify or WizeSaaS apps?
No, both Shopify and WizeSaaS apps are beginner-friendly. You can easily set up and customize them without any coding knowledge.
Join us as you begin your Shopify journey
We are e-commerce specialists and Shopify Partners. Get in touch with us if you need assistance with Shopify, need a whole website built, or have any other general questions.